
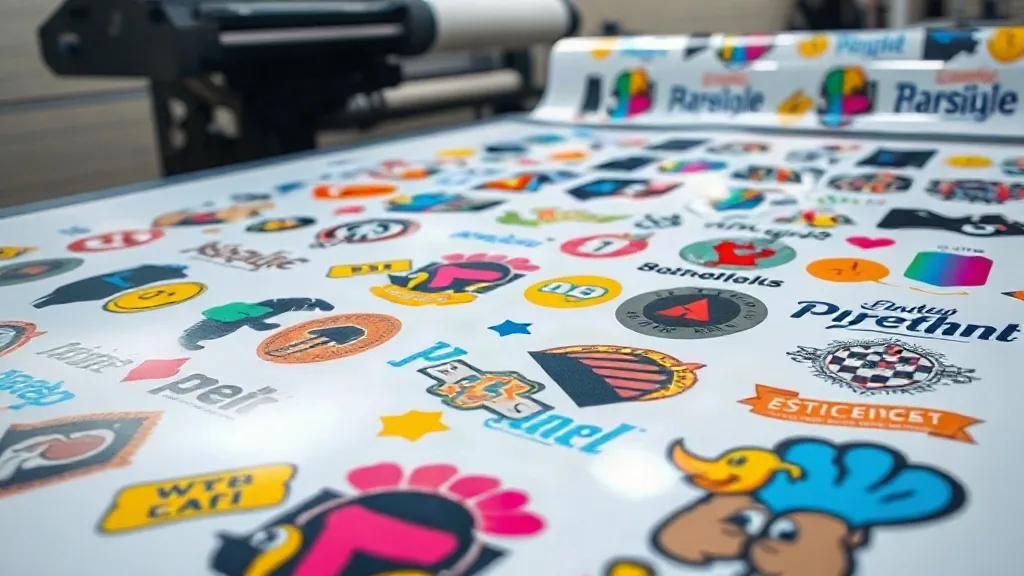
When you run a print shop, every square inch of transfer film counts. Waste eats into margins, and slow workflows eat into your day. That's where the DTF Gangsheet comes in. Instead of printing one design at a time, a gangsheet lets you arrange multiple designs on a single sheet, maximizing every inch of film and cutting your material costs. But it's more than just a cost-saver. It's a workflow revolution that can help you take on more orders, reduce errors, and deliver consistent quality that keeps customers coming back.
In this guide, we'll walk through what a DTF gangsheet is, why it matters for your bottom line, and how to make the most of this approach in your shop. Whether you're a one-person operation or managing a growing team, understanding gangsheets can be a game-changer.
What Exactly Is a DTF Gangsheet?
A DTF (Direct-to-Film) gangsheet is a single sheet of transfer film that contains multiple printed designs. Instead of printing each design on its own sheet, you nest them together efficiently, like a puzzle. This method is similar to gang printing in offset lithography, where multiple jobs are combined on one press run to save time and materials.
The process is straightforward: you design your artwork, arrange the designs on a template that fits your printer's maximum width, and print. The result is a sheet filled with various graphics, ready to be powdered, cured, and transferred onto garments. The key advantage is that you only handle one sheet through the entire process, which reduces setup time and waste.
How DTF Gangsheets Differ from Single-Design Sheets
With single-design sheets, you print one image per sheet, which often leaves unused film around the design. That leftover film is waste. Gangsheets eliminate that by filling the sheet with as many designs as possible. You might print a mix of sizes, from small logos to large back prints, all on one sheet. This not only saves film but also reduces the number of times you need to reload the printer, powder, and cure.
The Business Case for DTF Gangsheets
Let's talk numbers. Film and powder are two of your biggest consumable costs in DTF printing. By using gangsheets, you can significantly reduce both. For example, if you print a batch of 50 small chest logos, a single-design approach might use 50 separate sheets, each with a lot of empty space. A gangsheet could fit all 50 logos on just a few sheets, cutting film usage by 30-50% or more. That's money back in your pocket.
But the savings go beyond materials. Time is money, and gangsheets save time in several ways:
- Fewer printer reloads: You load one sheet instead of many, reducing manual handling.
- Faster powdering and curing: You process one large sheet rather than multiple small ones, which is more efficient.
- Less cutting time: If you arrange designs with shared cut lines, you can cut multiple designs with fewer passes.
- Reduced error rate: Handling fewer sheets means fewer opportunities for mistakes like misalignment or contamination.
All of this adds up to higher throughput and better margins. And when you can offer competitive pricing without sacrificing quality, you win more business.
Cost Savings Example
Imagine you're printing 100 shirts with a small left-chest logo. With single-design sheets, you might use 100 sheets of film (one per shirt). If each sheet costs $0.50, that's $50 in film alone. With a gangsheet, you could fit 20 logos per sheet, using only 5 sheets. That's $2.50 in film, a 95% savings. Even accounting for the larger sheet size, the savings are substantial. Plus, you'll use less powder and energy.
Designing for Gangsheets: Best Practices
Creating an efficient gangsheet requires a bit of planning. Here are some tips to maximize your sheets:
- Nest designs tightly: Arrange designs to minimize gaps. Rotate designs if necessary to fill odd spaces.
- Group by size: Place similar-sized designs together to make cutting easier.
- Leave space for cut lines: Ensure there's enough space between designs for cutting; typically 0.25 inches is sufficient.
- Consider the grain: If your film has a grain direction, align designs accordingly to avoid stretching or distortion.
- Use gangsheet software: Many RIP software programs have nesting features that automatically arrange designs for optimal use. Invest in one if you're doing high volume.
Also, think about the order of designs. If you have a mix of small and large graphics, place the large ones first, then fill gaps with smaller ones. This ensures you use every inch.
Common Mistakes to Avoid
Overcrowding is a common pitfall. While you want to maximize space, leaving too little room between designs can make cutting difficult and lead to peeling or misalignment. Also, avoid placing designs too close to the edge of the sheet, as the edges may not receive even powder or curing. And always test your layout before printing a full batch; a small mistake in nesting can waste an entire sheet.
Choosing the Right DTF Gangsheet Supplier
Not all gangsheets are created equal. The quality of the film, powder, and ink you use directly affects the final print. When sourcing gangsheets, look for suppliers that offer:
- High-quality film: It should be compatible with your printer and provide excellent ink adhesion.
- Consistent thickness: Uniform film thickness ensures even powder application and curing.
- Reliable support: A supplier who can answer technical questions and provide guidance is invaluable.
- Competitive pricing: Compare costs per square inch, not just per sheet, to get the best value.
Many print shops find that ordering pre-made gangsheets from a specialized supplier can be more cost-effective than producing them in-house, especially for smaller shops that lack high-volume printers. These suppliers can gang multiple designs from different customers onto one sheet, passing on the savings. If you're considering outsourcing, look for a provider that offers fast turnaround and consistent quality.
Integrating Gangsheets into Your Workflow
To get the most out of gangsheets, you need to adapt your workflow. Here's a step-by-step approach:
- Collect and organize orders: Group orders by due date and design complexity. Identify designs that can be combined onto a gangsheet.
- Prepare artwork: Ensure all designs are print-ready, with correct dimensions and resolution. Remove backgrounds if necessary.
- Nest designs: Use software or manual layout to arrange designs on the sheet template. Aim for at least 80% coverage.
- Print and process: Print the gangsheet, apply powder, and cure as usual. Because the sheet is larger, ensure your powder station and curing oven can handle the size.
- Cut and transfer: Cut out individual designs. If you have a cutting plotter, you can set it to cut along predefined lines. Otherwise, use scissors or a rotary cutter.
- Press and finish: Transfer each design onto the garment using a heat press. Follow the recommended temperature and time for your materials.
It's also wise to keep a log of your gangsheet layouts. Note which combinations worked well and which led to waste. Over time, you'll develop a intuition for efficient nesting.
Case Study: A Small Shop's Success
Take the example of a two-person print shop in Austin, Texas. They specialized in custom team jerseys and small-batch merch. By switching to gangsheets, they reduced film costs by 40% and cut their production time per order by 25%. They were able to take on more last-minute orders and increase their monthly revenue by 30% within three months. The key was batching similar orders and using nesting software to automate layout.
Frequently Asked Questions About DTF Gangsheets
What is the maximum size for a DTF gangsheet?
The maximum size depends on your printer's capabilities. Most DTF printers can handle sheets up to 13 inches wide by 19 inches long, but some industrial models can go up to 24 inches or more. Always check your printer's specifications and ensure your film and powder station can accommodate the size.
Can I mix different designs on one gangsheet?
Absolutely. That's the whole point. You can combine any designs as long as they fit within the sheet dimensions. Just ensure that all designs use the same ink and powder settings; if you have designs with different requirements (e.g., white ink vs. no white ink), you may need to separate them.
How do I calculate the savings from using gangsheets?
To calculate savings, compare the total square inches of film used per design in a single-design approach versus a gangsheet approach. Multiply by the cost per square inch of film, then add savings from reduced powder and time. A simple spreadsheet can help you track this over time.
Is it better to make my own gangsheets or order them pre-made?
It depends on your volume and equipment. If you have a high-volume printer and the time to nest designs, making your own can be cost-effective. For smaller shops or those without nesting software, ordering pre-made gangsheets from a supplier can save time and reduce waste, often at a competitive price.
What are the common pitfalls with gangsheets?
Overcrowding, insufficient spacing for cut lines, and ignoring film grain are common mistakes. Also, failing to account for the time needed to cut individual designs can negate some time savings. Always test a new layout on a small scale before committing to a full batch.
DTF gangsheets are more than a trend; they're a practical solution for print shops looking to improve efficiency and profitability. By adopting this method, you can reduce waste, speed up production, and offer better pricing to your customers. Start small, experiment with layouts, and soon you'll wonder how you ever managed without them.